|
|
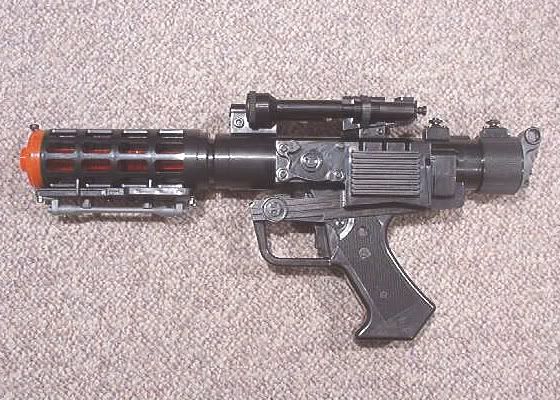
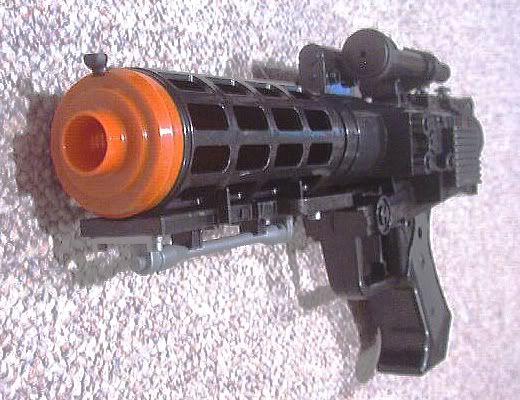
Post by kivaanzion on May 28, 2006 22:37:25 GMT -5
|
|
|
|
Post by Ldi-Ovef Te_Azi on May 28, 2006 23:30:26 GMT -5
wow, that is like night and day
|
|
Don Solo
Message Board Member
Posts: 341
|
Post by Don Solo on May 29, 2006 2:42:04 GMT -5
Very nice... how long did that take you, start to finish?
|
|
|
|
Post by kivaanzion on May 29, 2006 6:10:14 GMT -5
Many thanks guys! ;D
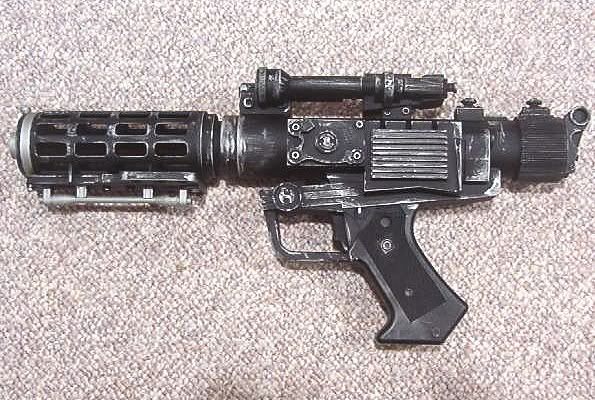
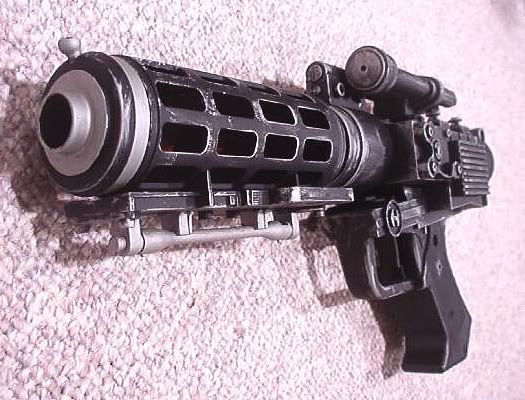
Took about 3 to 4 hours. Mostly waiting for the paint to dry. The drybrushing itself took about an hour. Afterward I sprayed the entire blaster with dullcote to seal the finish (the drybrush steel has a tendency to rub off otherwise).
|
|
|
|
Post by Seda Navilli on May 29, 2006 8:01:28 GMT -5
That is awesome! I want one  Have you thought about putting something inside it to give it some extra weight? |
|
|
|
Post by rebelscum on May 29, 2006 17:59:14 GMT -5
It looks great. I love how a little drybrushing can dramatically improve the look of a project. So quick and so easy to do!
|
|
jayden
Message Board Member
Jedi Padawan Son of Jedi Knight Tysie
Posts: 90
|
Post by jayden on May 29, 2006 21:29:23 GMT -5
wow that looks cool il have to try it hehe.
|
|
|
|
Post by kivaanzion on May 29, 2006 21:38:41 GMT -5
Thanks again guys! Drybrushing is pretty easy once you get the hang of it.  I used to have a POTF Stormtrooper blaster that I re-painted the same way. It was originally white (I guess to prevent it being mistaken for a real weapon). 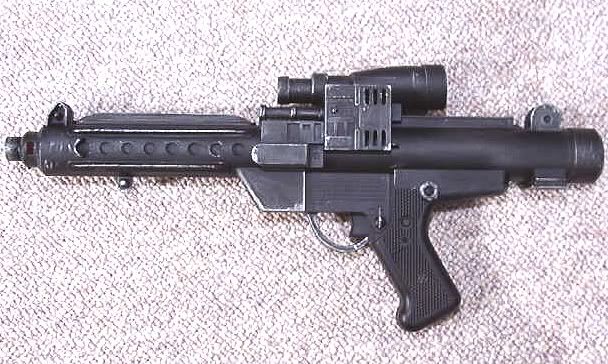 I sold it on ebay back in 2004. Ironically when I bought the Grievous blaster, I noticed they were re-selling the Stormtrooper blaster as a Clonetrooper blaster. It had a paintjob much like the one I did two years ago. Have you thought about putting something inside it to give it some extra weight? It never really occurred to me. I suppose I could add some lead weights to the inside of the pistol grip as it is most likely hollow- just have to find the motivation to take it apart.  |
|
|
|
Post by Johann Shinobi on May 30, 2006 19:45:10 GMT -5
You should do a tutorial on how you did these.
|
|
|
|
Post by jedi12 on May 30, 2006 19:57:51 GMT -5
wow ki vaan that is cool
|
|
|
|
Post by Leda EmBorr on May 30, 2006 21:26:04 GMT -5
Yeah, well done. That's the one thing I never notice... the details of the various blasters. I guess if I knew more about guns in general I would know what to look for. Nice job! |
|
|
|
Post by kivaanzion on May 30, 2006 23:27:42 GMT -5
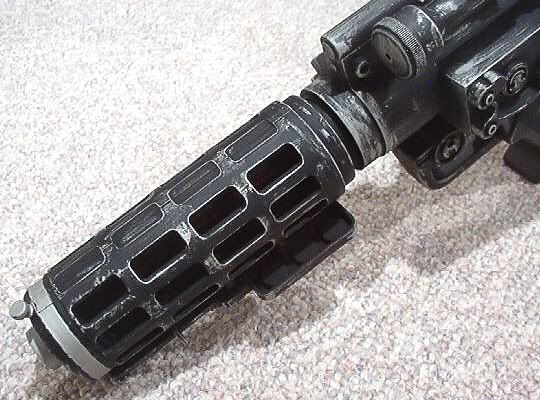
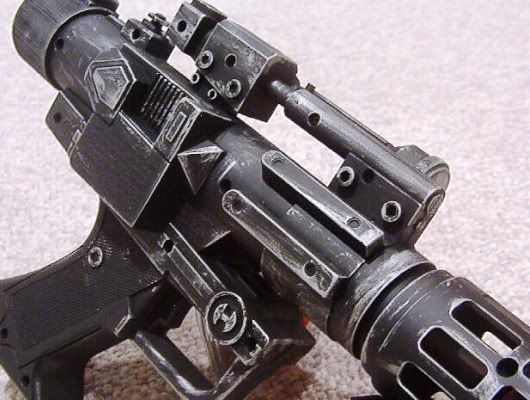
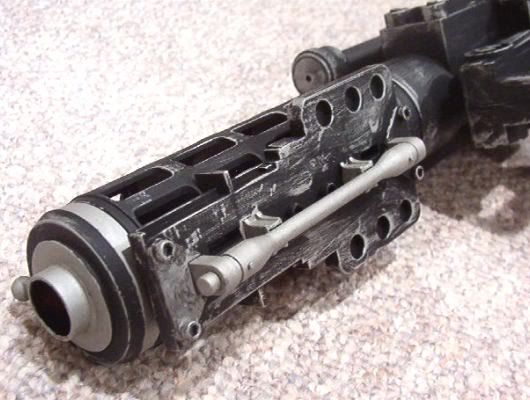
Thanks again for the compliments everyone! Drybrushing is pretty straightforward but takes a bit of practice to become good at it. Here's how I do it: 1- Spray-paint the entire gun (blaster/rifle) flat black. Flat black works best with drybrushing. The steel highlights will "stick" better to flat black paint. Besides semi-gloss or gloss just won't look right (gloss looks new and the whole point of drybrushing is to make something look old ). Any brand of flat black paint will do as long as it is fast drying. 2- Now for the drybrushing. The easiest method is to take you paintbrush and dab a tiny bit of steel paint on the tip. On a s-c-r-a-p piece of paper you then rub your brush until the paint is almost gone. You can then apply what is left to the blaster. This is the part that takes a lot of practice. If you use too much paint, it just won't look right. Instead of looking worn, it will just look like silver paint got on the gun. It is best to try this on some s-c-r-a-p plastic until you feel confident to try this with your blaster. Remember- less is always better. 3- How to make something look worn: This is another part that takes some practice. If you look at pictures of old guns, pay close attention to the parts that are worn. These are usually raised areas that take a beating first. Sharp edges, corners, parts that stick out, will have the most drybrush highlights- sometimes so much that you can barely see the black paint left. Other sunken areas will have little or no drybrush highlights. Now I have learned other ways to highlight without a brush. I sometimes use a folded up piece of cardboard with some paint on it. I rub the cardboard on some sc-r-a-p paper until the paint is almost gone, and then rub it on the edges, raised parts I want to highlight. With the Grievous blaster I tried a new way by putting on a disposable rubber glove, and using the tip of my finger to rub the paint on. One more thing- I have always used steel coloured paint for the highlights- not silver. Silver tends to be a bit too bright against flat black; and the gun is supposed to be made of steel anyway, not silver right? Hope this helps. PS- I can't believe the censor won't allow me to use the word s-c-r-a-p. Umm... is there anyway to dial this thing back a bit?  |
|
|
|
Post by Ldi-Ovef Te_Azi on May 31, 2006 13:40:54 GMT -5
you can put an underline prompt in between two of the letters in the word so it looks normal to the human eye, but you dont get censored.
|
|
Obi-1
Message Board Member
Posts: 215
|
Post by Obi-1 on May 31, 2006 14:53:20 GMT -5
Wow, that looks amazing it went from what looked like a cheap toy to soething that looks like it was used on set or sold by MR.
|
|
|
|
Post by Stey Fann Jull on Nov 1, 2006 18:37:53 GMT -5
I just finished my blastech imperial blaster. Its a couples or hours of paint job  I added some heavy metal parts mixed with hot glue in the inside so it feels heavy |
|
 ;D
;D