Post by Ani-Chay Pinn on Feb 5, 2008 0:16:08 GMT -5
Ever have problems keeping those pesky food capsules and your lightsaber clip on your belt? Do they ride up and come off, especially when you sit down? I made this little modification before DragonCon last year and it worked very well.
*** Adding 'Clip Edges' to the Inside Of Your Jedi Belt ***
You need:
- Long leather scraps to make clip 'edges' with
- Knife for cutting leather
- Bevel for edges of leather, or just use the knife
- Pencil
- Metal straight edge for cutting leather (I use a metal ruler)
- Leather glue (I use Leather Weld)
(1.) Unbuckle your belt so it lays flat with the inside facing up.
(2.) Attach your food capsules and saber clip in the places where you usually wear them.
(3.) Mark where the inside top part of the clips are - the food capsules and the saber clips do not grab at the same places.
(4.) Remove the capsules and saber clip.
(5.) Draw straight pencil lines along the markings. These marks should cover the range of places where you clip things on the belt.
(6.) Cut one quarter inch wide strips of thin leather (I used leftover 4-5 oz leather) 3 to 6 inches long depending on where you wear your belt accessories.
(7.) Bevel the edges of the smooth side of the leather strips - this will allow the clips to slide on and off easier.
(8.) Lay the strips along the pencil lines on the inside of your belt.
(9.) Take your food capsules and saber clip and see how they will slide over the clip edges and 'hook' on them when they are attached to the belt. This is to double check that the clip edges are in the right place and on the right side of the pencil line, so your accessories will sit right and securely on the belt.
(10.) Glue the clip edges to the inside of the belt - gluing the rough side of the clip edges to the inside of the belt.
That's it.
You don't have to dye anything since these are on the inside of the belt where they won't be seen.
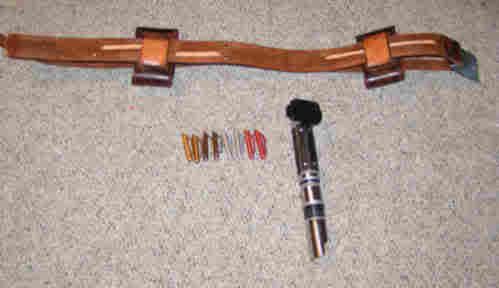
This is the belt showing the clip edges and the accessories I want to put on my belt:

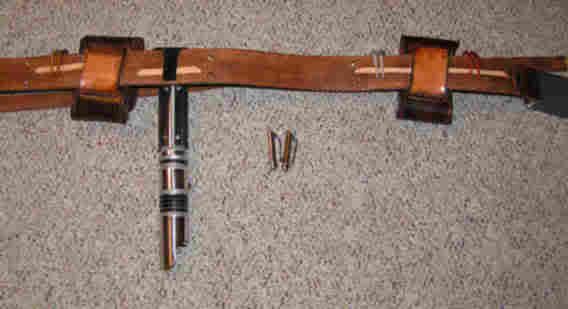
The underside of the belt with the accessories attached:

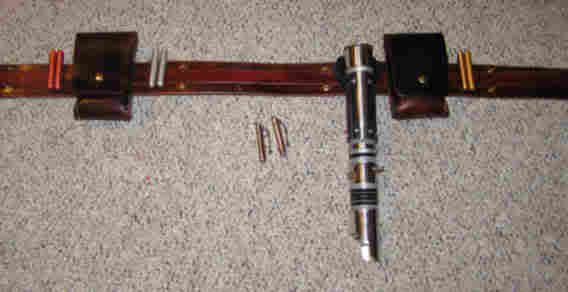
The front of the belt with the accessories attached:

*** Adding 'Clip Edges' to the Inside Of Your Jedi Belt ***
You need:
- Long leather scraps to make clip 'edges' with
- Knife for cutting leather
- Bevel for edges of leather, or just use the knife
- Pencil
- Metal straight edge for cutting leather (I use a metal ruler)
- Leather glue (I use Leather Weld)
(1.) Unbuckle your belt so it lays flat with the inside facing up.
(2.) Attach your food capsules and saber clip in the places where you usually wear them.
(3.) Mark where the inside top part of the clips are - the food capsules and the saber clips do not grab at the same places.
(4.) Remove the capsules and saber clip.
(5.) Draw straight pencil lines along the markings. These marks should cover the range of places where you clip things on the belt.
(6.) Cut one quarter inch wide strips of thin leather (I used leftover 4-5 oz leather) 3 to 6 inches long depending on where you wear your belt accessories.
(7.) Bevel the edges of the smooth side of the leather strips - this will allow the clips to slide on and off easier.
(8.) Lay the strips along the pencil lines on the inside of your belt.
(9.) Take your food capsules and saber clip and see how they will slide over the clip edges and 'hook' on them when they are attached to the belt. This is to double check that the clip edges are in the right place and on the right side of the pencil line, so your accessories will sit right and securely on the belt.
(10.) Glue the clip edges to the inside of the belt - gluing the rough side of the clip edges to the inside of the belt.
That's it.
You don't have to dye anything since these are on the inside of the belt where they won't be seen.
This is the belt showing the clip edges and the accessories I want to put on my belt:

The underside of the belt with the accessories attached:

The front of the belt with the accessories attached:


