|
|
Post by Olos Nay on Apr 8, 2006 23:32:18 GMT -5
its made by 3M, and the lettering companies uses them when they put writing on trucks and the like.
|
|
|
|
Post by Ldi-Ovef Te_Azi on Apr 17, 2006 0:19:32 GMT -5
if you ever want to rotoscope here is the link to learn how to do it, it took me about 3 or 4 tries to get it right. www.alienryderflex.com/rotoscope/this was my first attempt:  |
|
|
|
Post by himiko sabbrawrra on Apr 17, 2006 0:34:08 GMT -5
That looks to complicated...
|
|
|
|
Post by Seda Navilli on Apr 17, 2006 6:48:04 GMT -5
That technique is way too complex, and doesnt allow much room for adjustment. There is a much better tutorial out there, I call it the once, twice, thrice method. ALOT less complicated, and actually produces better results. I'll have a look for the link... Here it is; a 5.6MB .mov file. theforce.net/fanfilms/postproduction/sabres/photoshopsabertutorial.movhave fun! |
|
|
|
Post by tanzanlinnear on Apr 17, 2006 8:30:35 GMT -5
As I don't have photoshop, I have to use a slightly different method for rotoscoping, which is very easy and quick to do.
1. Open picure file and create a new layer.
2. Draw a straight white line wide enough to cover a duelling rod (Or appropriate width, if the saber is only a hilt prop. If the saber is only a hilt, start the line from the mid-point of the grip, as that then makes sure the angle of the blade is correct.)
3. Apply a gaussian blur with a value of 1.00 to the layer.
4. Use the eraser tool to tidy up the end of the blade on the emitter (the beam does not blur at the emitter, but is a 'clean' line) This is now the Core Layer
5. Create another new layer.
6. Using the same tool settings as before (but with your blade color of choice) draw another line directly over the white line. This line does not need to be as long as the white line, as the 'glow of a saber's blade does not extend as far from the top or bottom as it does from the sides.
7. Apply a gaussian blur with a value of 1.00 to this new layer.
8. Copy the 'colored line' layer and paste it three times onto the canvas.
9. Starting at the top layer, and working on each layer individually, add a gaussian blur to the 'top three' layers, increasing the value of the blur on each level, by a factor of three. The values can change depending on the thickness of the core, for example, the layer blurs might be 3,6,9, or 5,10,15, or 10,20,30, but the rule always remains the same.
10. Move the fourth 'color layer' so it becomes the uppermost layer.
11. Move the Core Layer so it is is the uppermost layer above all the 'glow layers'.
12. Flatten the image and save.
|
|
|
|
Post by Leda EmBorr on Apr 17, 2006 21:25:59 GMT -5
Um....... what program would you be using to do this?
|
|
|
|
Post by Leda EmBorr on Apr 17, 2006 21:39:26 GMT -5
|
|
|
|
Post by Leda EmBorr on Apr 17, 2006 21:40:00 GMT -5
if you ever want to rotoscope here is the link to learn how to do it, it took me about 3 or 4 tries to get it right. www.alienryderflex.com/rotoscope/this was my first attempt: Looking pretty darn good!  |
|
|
|
Post by Theyrenotdolls (Den Dragonson) on Apr 17, 2006 21:44:30 GMT -5
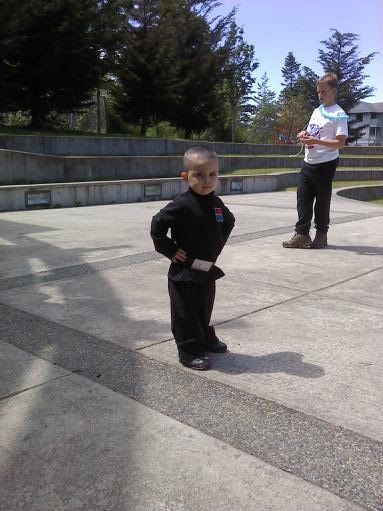
no...you dont have to have a blade...but you do have to hum whenever you're taking pics with your saber....lol
|
|
|
|
Post by tanzanlinnear on Apr 19, 2006 5:04:31 GMT -5
Um....... what program would you be using to do this? I use CoralDraw 8. Quite an old package now, based off Photoshop, but it does all I need it to  |
|
|
|
Post by Leda EmBorr on Apr 19, 2006 21:06:43 GMT -5
Ah ok, thanks... You're right, that is old! Isn't CorelDraw up to like 11 or something?
|
|
|
|
Post by tanzanlinnear on Apr 20, 2006 3:45:41 GMT -5
I think it is ;D I got 8 with my first computer about 5-6 years ago, and as it was so close to the Photoshop of the day, it had enough features to do everything I needed it to, and even now, it's still upto the job |
|
|
|
Post by Ani-Chay Pinn on Apr 20, 2006 19:51:07 GMT -5
I use Corel Draw 11 and they've gone beyond that. It's called Corel Draw X3.
|
|
|
|
Post by Ldi-Ovef Te_Azi on Apr 26, 2006 1:03:19 GMT -5
That technique is way too complex, and doesnt allow much room for adjustment. There is a much better tutorial out there, I call it the once, twice, thrice method. ALOT less complicated, and actually produces better results. I'll have a look for the link... Here it is; a 5.6MB .mov file. theforce.net/fanfilms/postproduction/sabres/photoshopsabertutorial.movhave fun! i just tried out this tutorial, and compared it to my link, and though yours is a much less complicated and less time consuming......frankly the results are not nearly as good, the fade is dismal to say the least. i much prefer the results of the longer method...although it was enlightening trying a new method out, but i shall stick to the one i learned. |
|
|
|
Post by Leda EmBorr on Apr 26, 2006 21:44:23 GMT -5
Ah.... thanks for the heads up on that!
I can't say that I've tried out any of these other methods, but it's always good to experiment to see which one suits you best!
|
|