|
|
Post by Koda Vonnor on May 26, 2008 21:42:18 GMT -5
Here's the hard model for the shoulder bell... 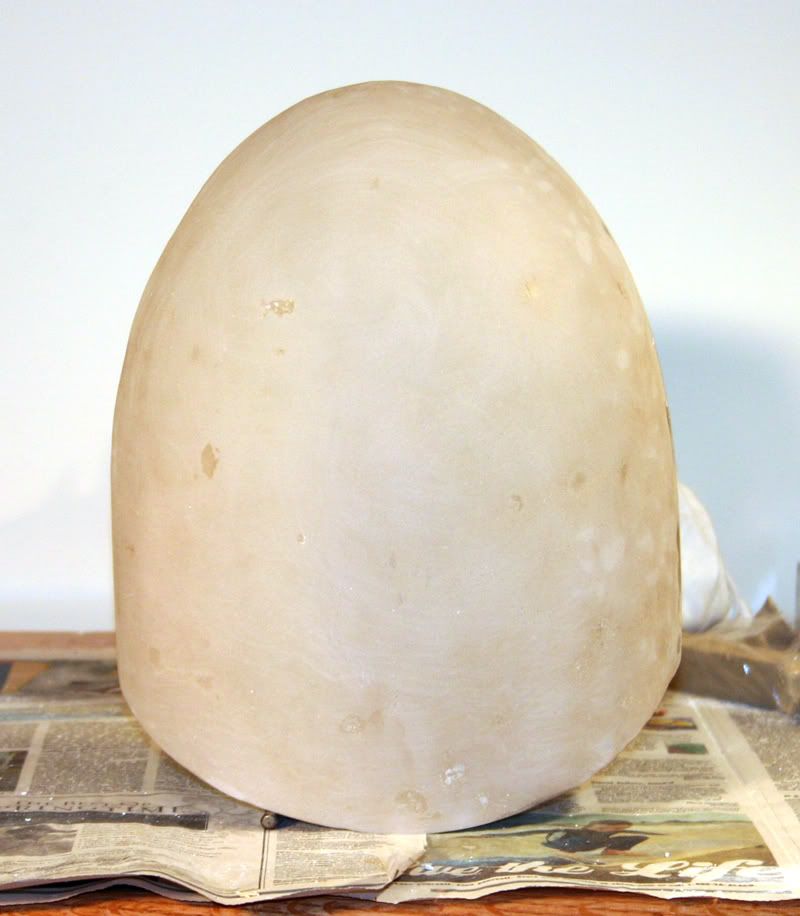 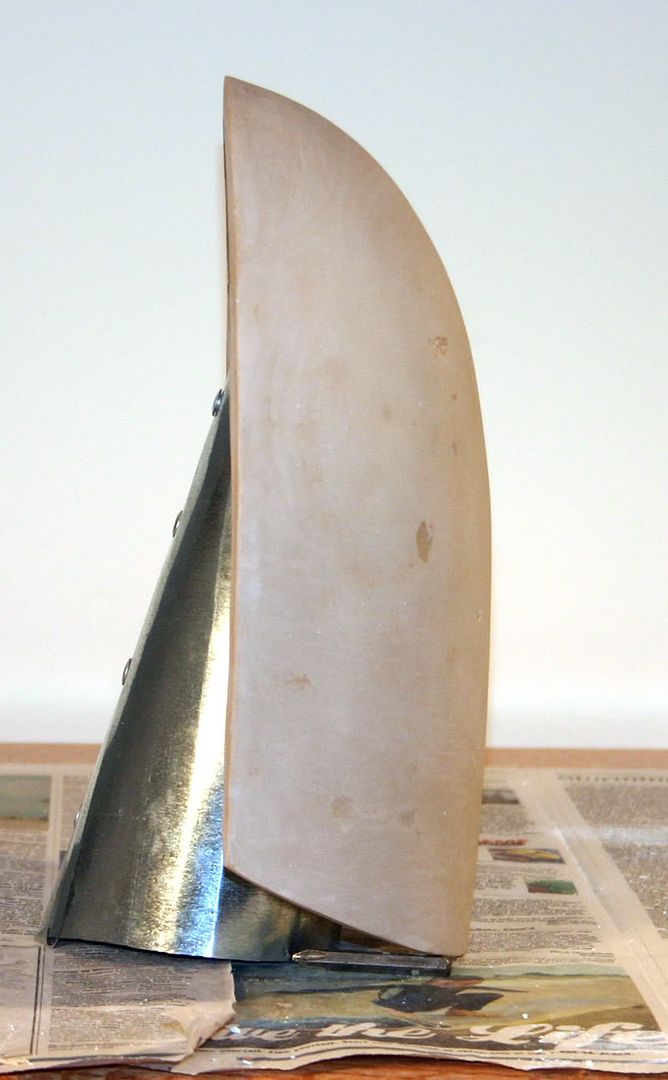 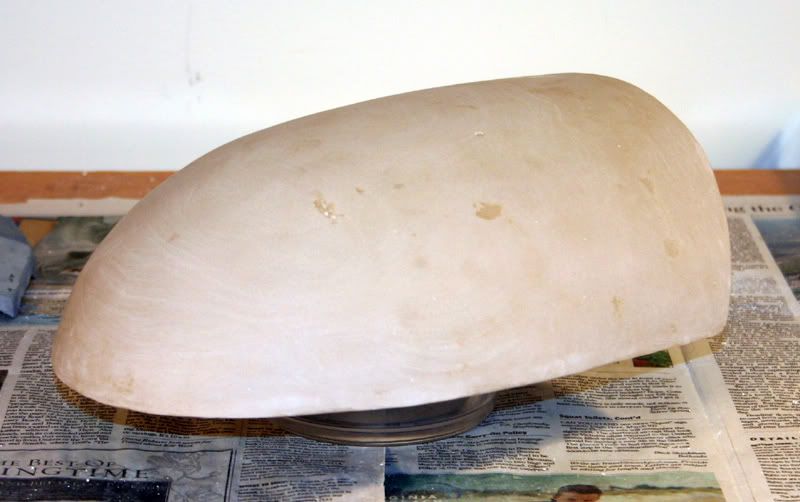 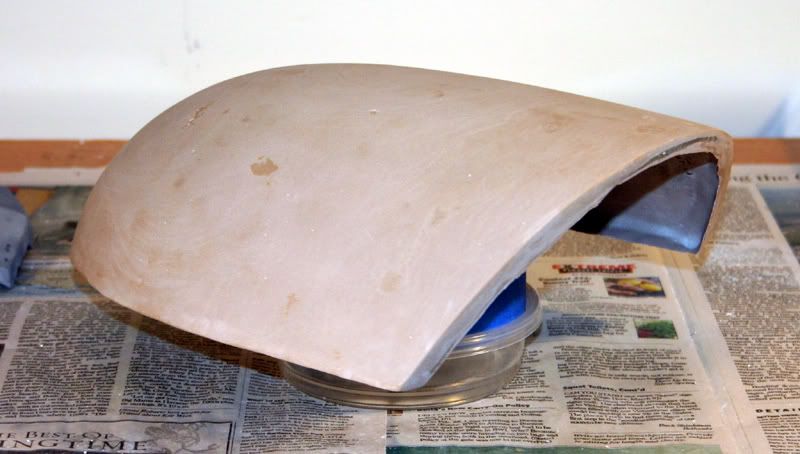 I still have to shape the curvature better and smooth out the surface some more, but it turned out decent and workable. I will fill in the back side with clay to about half inch thick overall, then make a two part mold to cast the final pieces. Lessons learned:- You can see in the pix there are a couple dozen low spots, 5-6 of which were from pockets of un-cured resin. I know what I did wrong there, I mixed the bondo hardener and the resin catalyst in the same cup that I mixed the bondo and resin in for the gelcoat, then poured the whole mess into the mold. I should have poured the homemade gelcoat into another cup before adding the hardener. There was some unmixed resin on the sides of the cup that got into the mold as I poured.  - I should have left the plastic harden overnight before breaking it out of the mold. When I did the handguards they shrunk a tiny bit as they cured, and popped right out of the mold with no problems. I only waited like three hours. When I demolded it there was a boatload of plaster totally stuck to the model. Also, just from jockying it around to try and break it free, I put several cracks in the bondo edges. Luckily, the plaster was pretty easy to scrape off and the cracks I can fill with epoxy. I'm sorely tempted to leave the low spots in the model. With a little creative weathering they could be blaster dings.  ~ Koda |
|
|
|
Post by Kryy Jacobi on May 26, 2008 22:17:01 GMT -5
Actually, that's a good creative solution -- I like the idea! And they did wear armor for a reason...  Looking great!  |
|
|
|
Post by Koda Vonnor on May 26, 2008 22:51:21 GMT -5
yeah and if you look at the original reference, his armor is all beat to poodoo...  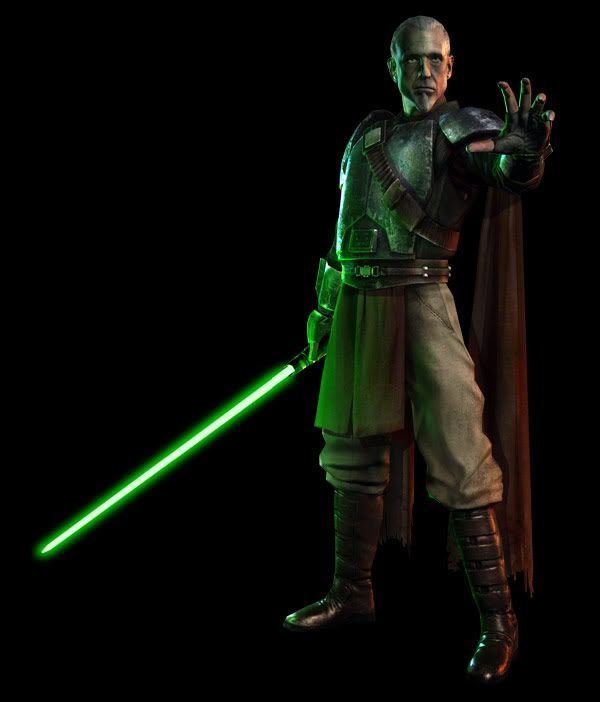 |
|
|
|
Post by Koda Vonnor on Jun 3, 2008 2:33:01 GMT -5
|
|
|
|
Post by Koda Vonnor on Jun 3, 2008 2:34:54 GMT -5
Here's a little photochop to kinda see the relative scaling, and how the shoulders sit ... 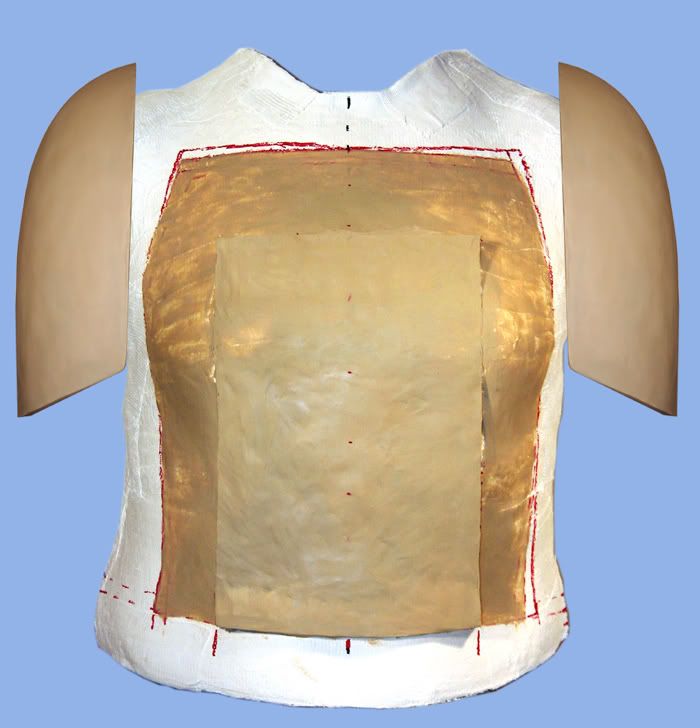 ~ Koda |
|
|
|
Post by Koda Vonnor on Jun 7, 2008 19:26:53 GMT -5
I've back filled the shoulder bell with clay, and today I smoothed it all out and masked it off for taking the mold. I cut two cardboard templates from outline tracings, and hot glued them to the model from the back. I put double-sided tape along the edges first to make it easier to remove the boards. The front join edges I filled with clay. The little clay "worms" around the boards are registry keys, to help keep the two halves of the mold lined up. The clay "funnel" at the top is where I'll pour in the resin. I will put the air-holes in the other half. The black line is roughly where the silicone rubber will stop and the plaster will begin. I sprayed the whole mess with clear coat. Tomorrow I make the mold. 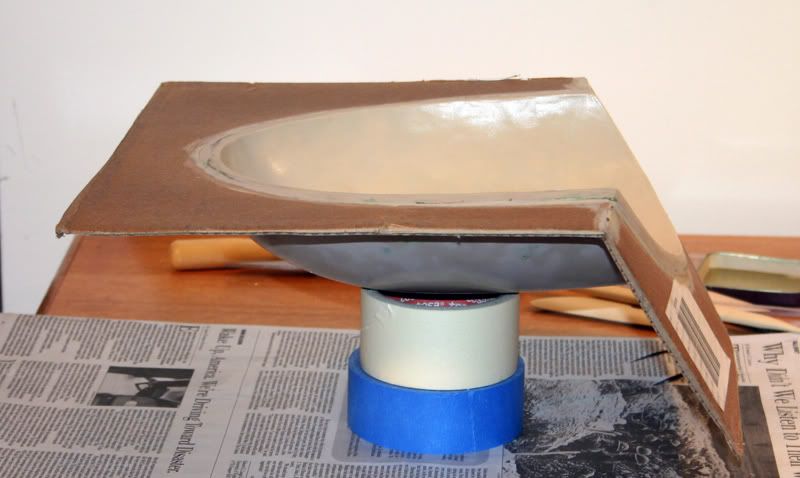 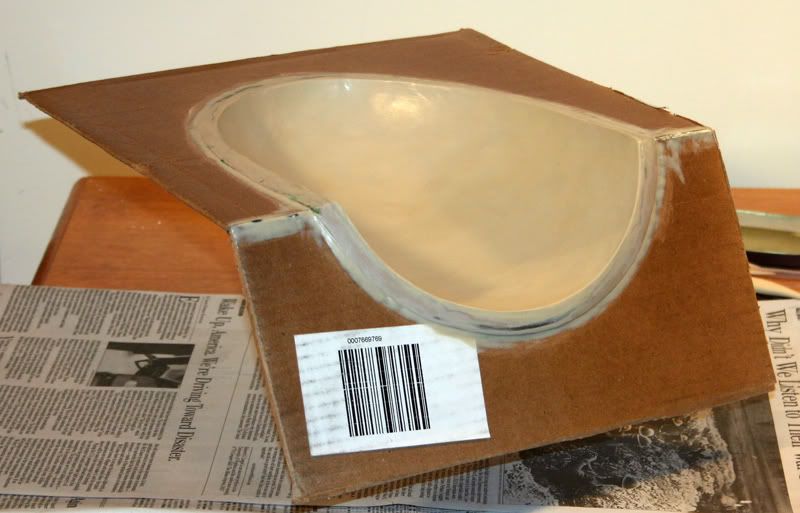 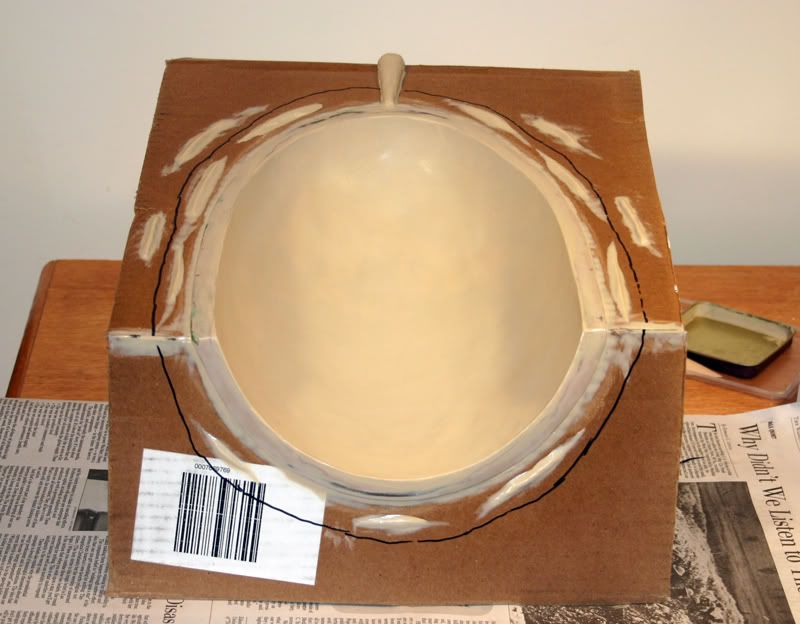 ~ Vonnor |
|
|
|
Post by Koda Vonnor on Jun 9, 2008 21:19:40 GMT -5
Could only finish half the master mold. I ran out of plaster.  I used Rebound-25 from Smooth-On for the rubber core. It was pretty easy to work with. Got more art plaster on the way. Will do the other half when it arrives. By rights it should have air-holes to either side of the pour hole. I forgot to put them in. I'll cut some in on the second half. 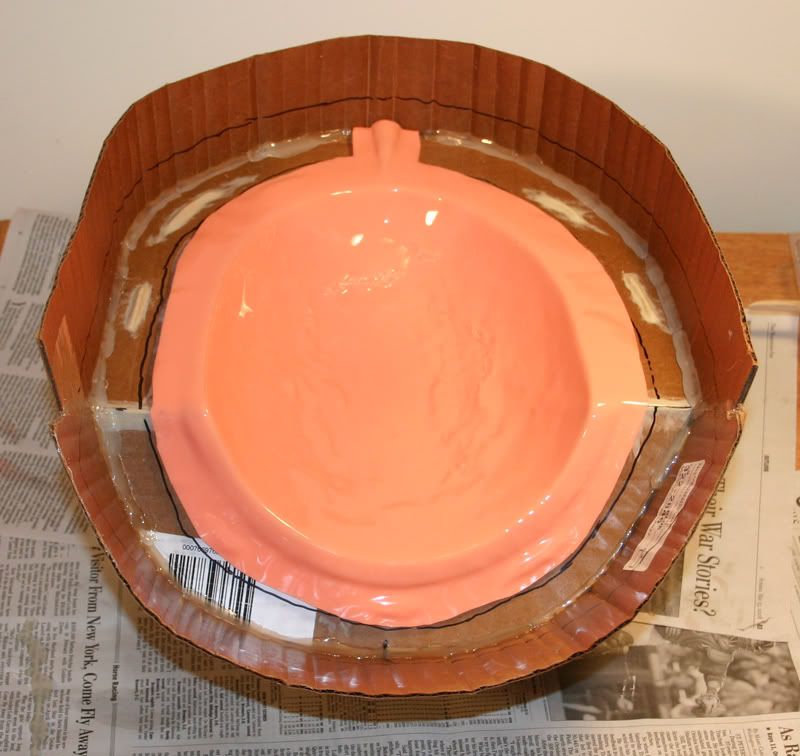 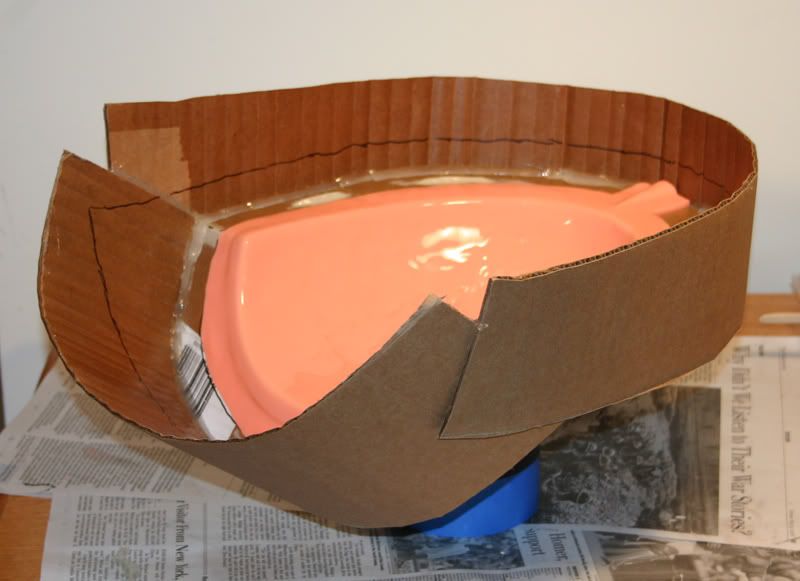 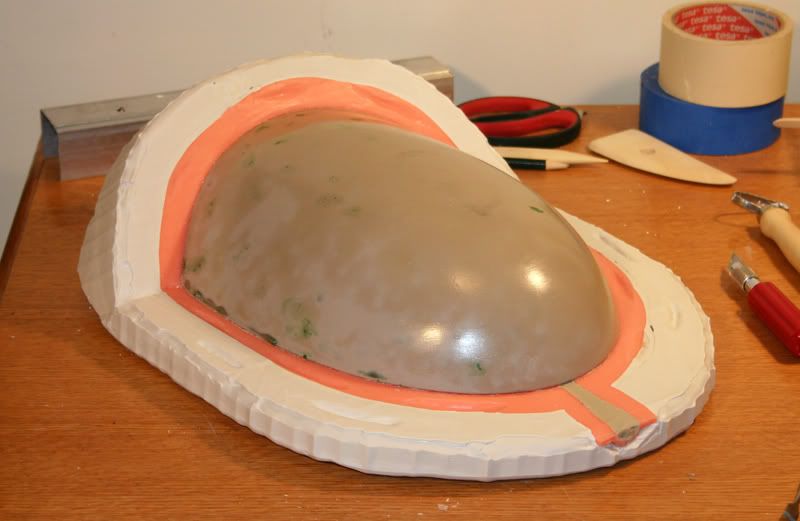 ~ Koda |
|
|
|
Post by I Five on Jun 10, 2008 15:13:32 GMT -5
|
|
|
|
Post by Koda Vonnor on Jun 10, 2008 17:51:18 GMT -5
Hey, no matter how it turns out, there'll always be one Force Unleashed character this costume will NEVER eclipse... ...juno what i mean?  |
|
|
|
Post by Koda Vonnor on Jun 13, 2008 10:41:43 GMT -5
New preview clip! Go to THE STORY OF TFUOK, I couldn't play it with the sound on 'cause I'm at work. But I guess my character dies? Vader is holding Rahm Kota's lightsaber in one scene. I'm confused by that, since the story has Kota becoming the Secret Apprentice's mentor. I see why it's best to not rush into a costume design with insufficient references  : - My lightsaber is close to accurate, but not exact. Not too happy about that. The pommel should not be tapered and should be capped with black. The black ring near the emitter has a radial groove cut in it. I might can get Don Close to make the black-capped pommel for me and maybe groove the emitter. It shouldn't be a big modification. I also have to move the brown suede wrap up to the switch area and replace it with black wrap down near the pommel. - I'm glad I waited on sculpting the BP. The clip shows the contour, thickness, and cut of it very well, especially the top edge. ;D - The handguards seem to sort of wrap around the wrist a bit. That'll have to be a revision two fix.  - The vambrace box/clips are cut a bit differently than what I did, taking them from the action fig. Also a revision two fix. Lastly... Holster. Definitely holster.  ~ KV |
|
|
|
Post by Koda Vonnor on Jun 14, 2008 22:08:31 GMT -5
Finished shell mold for the shoulders: 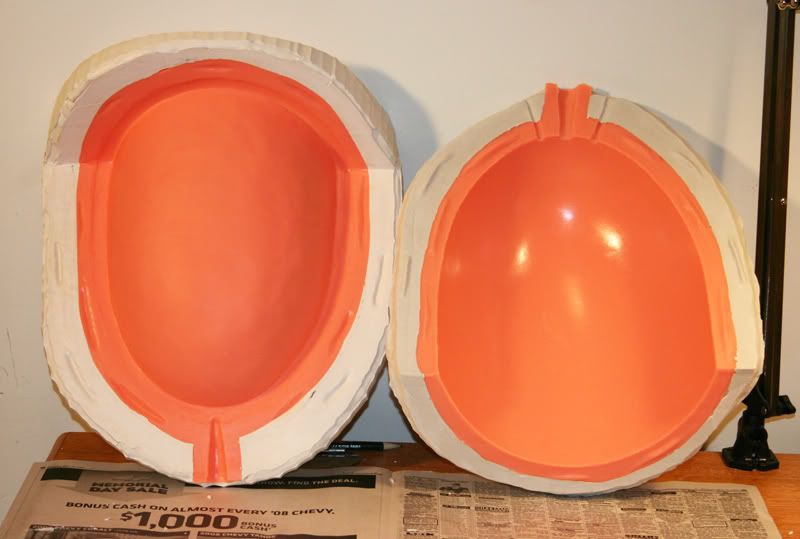 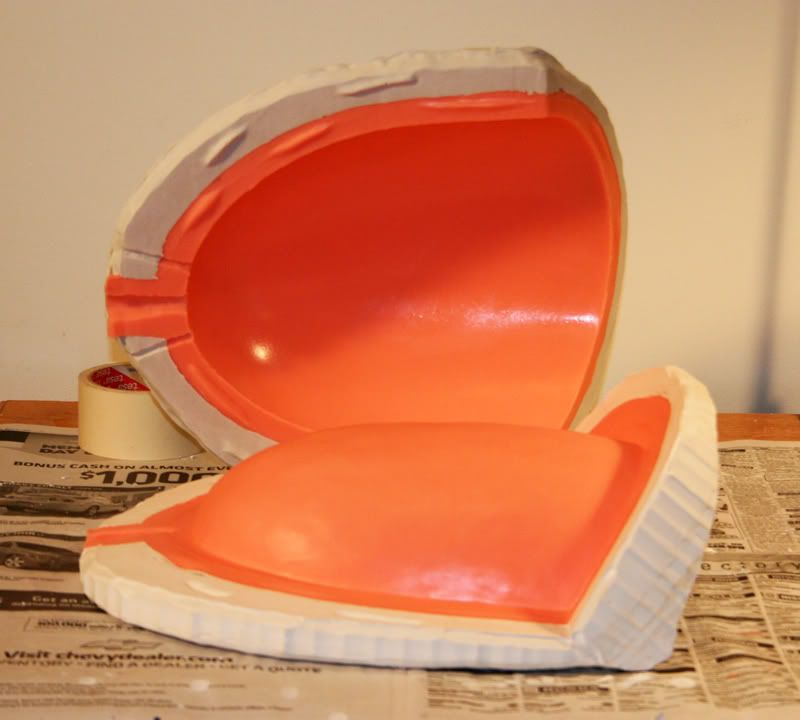 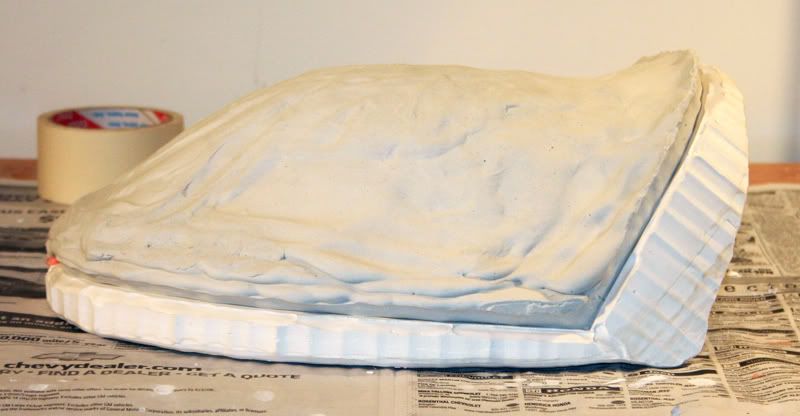 Weather permitting, I'll cast the shoulders tomorrow. ~ Vonnor |
|
Solinbeb Newau
Message Board Member
There are many ways to learn the ways of the Force, but only those who have joined it may know best.
Posts: 1,181
|
Post by Solinbeb Newau on Jun 15, 2008 7:39:50 GMT -5
New preview clip! Go to THE STORY OF TFUOK, I couldn't play it with the sound on 'cause I'm at work. But I guess my character dies? Vader is holding Rahm Kota's lightsaber in one scene. I'm confused by that, since the story has Kota becoming the Secret Apprentice's mentor. ~ KV If you go by the toy packages, as the appentice, you can apparently go either way...follow the darkside, or turn to the light. |
|
|
|
Post by Koda Vonnor on Jun 17, 2008 0:01:04 GMT -5
Today I found the Holy Grail of Kota reference pix!  Every scar on his face! Every ding in his armor! Every scratch on his boots! 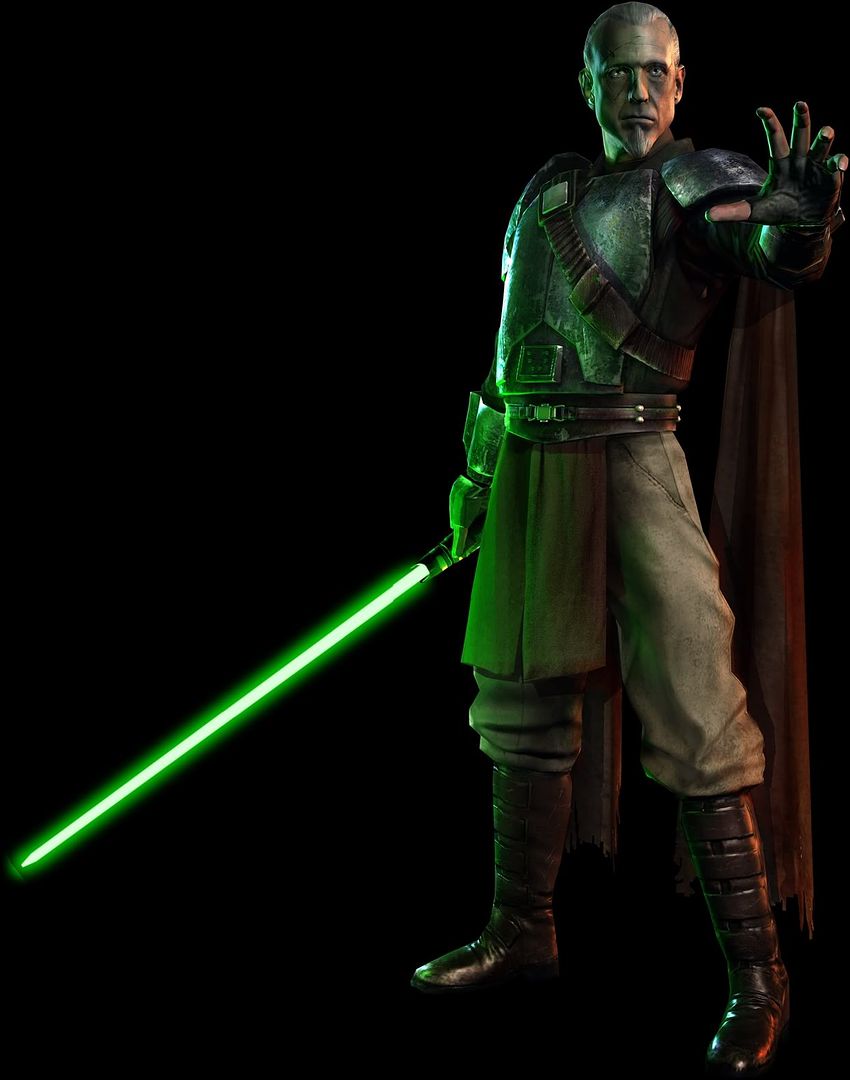 ~ Vonnor |
|
|
|
Post by Koda Vonnor on Jun 20, 2008 14:01:23 GMT -5
Well, I finally figured out how to fix the leaky shell mold. www.loctiteproducts.com/products/detail.asp?catID=14&subID=166&plID=178Ran a bead of that gunk all 'round the rim where the two rubber halves meet. Waited overnight and filled the mold with water. Not a leak in sight. ;D Only one small problem, when I took the shell apart to dry it out and prep it for the plastic pour, the blue gasket stuck partly to one side of the rubber and partly to the other side. In trying to get it apart cleanly I tore the gasket. I was able to pick off the residue and clean up the lining, then I applied mold release and another gasket bead. I will do the first pour tomorrow. Hopefully I put on enough release to keep the gasket from sticking. We'll see. I do expect to have about a 64th thick flashing along the edge to remove, due to the gasket. Pix to follow after the resin cures. ~ Vonnor |
|
|
|
Post by Koda Vonnor on Jun 21, 2008 16:52:55 GMT -5
I cast the production shoulder bells today. They came out all shiny and spiffy right out of the mold.  These pix are from the 2nd bell cast. I forgot to paint vasoline around the air holes on this one and demolding it took a couple of plaster divots. I think it should still be usable though as the hard shell backing the rubber seal is still sound. Note the blue RTV silicone gasket bead around the rim. This worked like a champ and only required a couple of elastic straps to hold the shell together. I used a teasp oon of gray color tint (3 white / 1 blk) in exactly 30oz of resin per bell. This is FeatherLight™ resin from Smooth-On. It can best be described as liquid sintra. I really like the results. It is heavily filled with some kind of plastic powder and the finished pieces are lighter than water. It pours with the viscosity of maple syrup and is easy to control. Each bell weighs just under a pound and is 5/8" thick in the center tapering to 1/2". Tomorrow I beat these up and make them look like the handguards. ;D 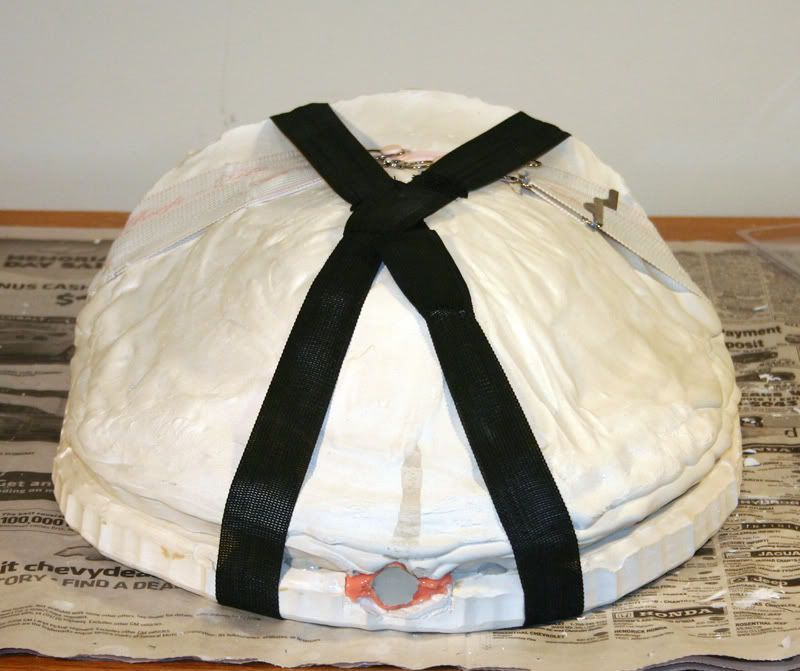 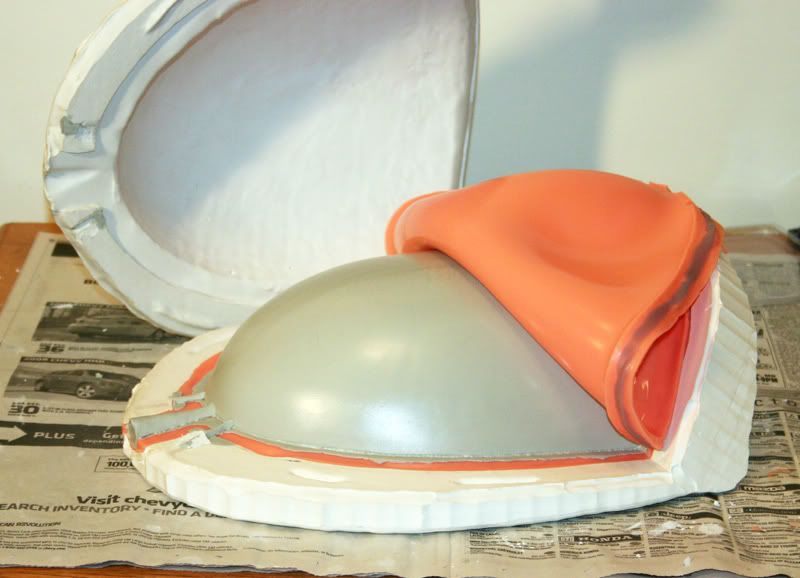 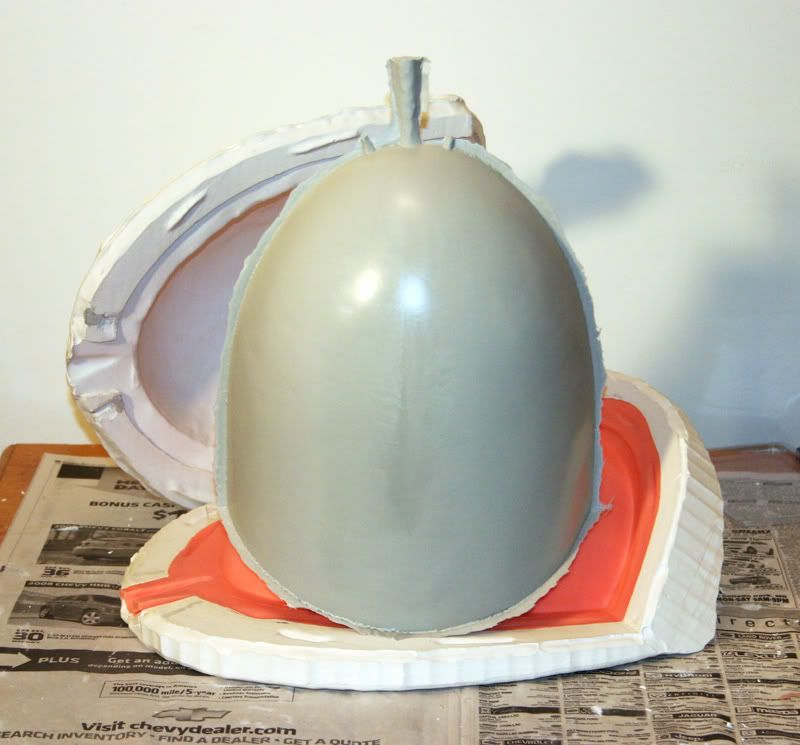 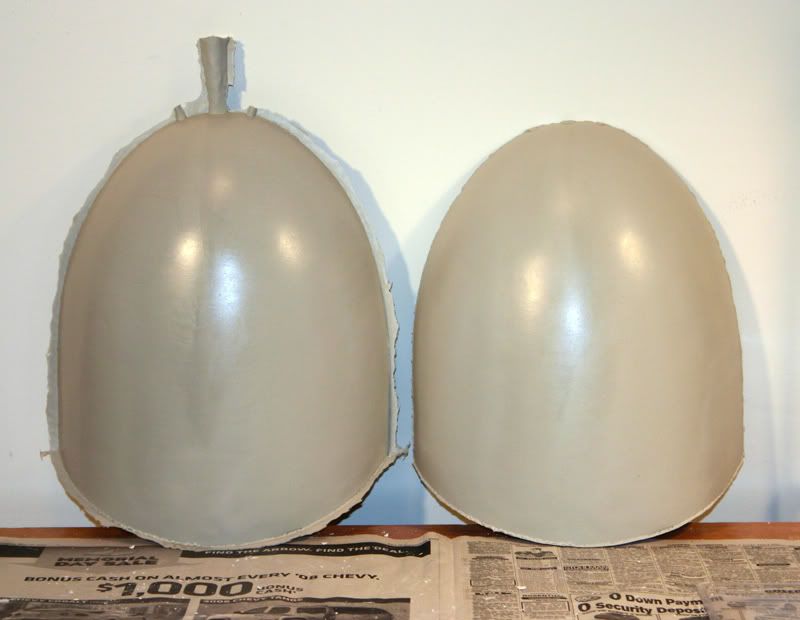 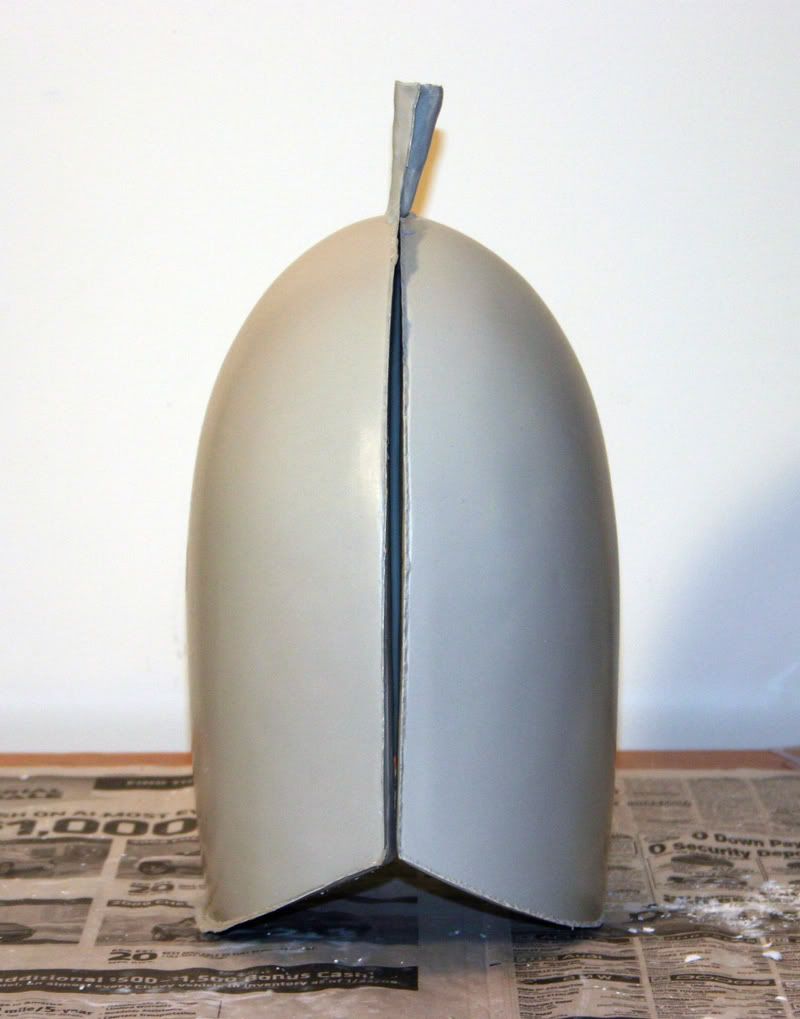 ~ Vonnor |
|