|
|
Post by J'aii-Gun Jiinn on Apr 14, 2008 7:52:22 GMT -5
 SWEET!! It looks like it's really coming togther~
|
|
|
|
Post by Jedimom/Cor-Al Gelkar on Apr 14, 2008 12:39:03 GMT -5
Man that's gonna look great Koda!
|
|
|
|
Post by Koda Vonnor on Apr 18, 2008 23:06:16 GMT -5
Boot prototype... from Carlos Diaz. I replied that I didn't like the way the velcro stitching shows on the front of the straps. I requested that he line the straps and attach the velcro to the lining only. We'll see how it comes out. He is communicating very well on this project. 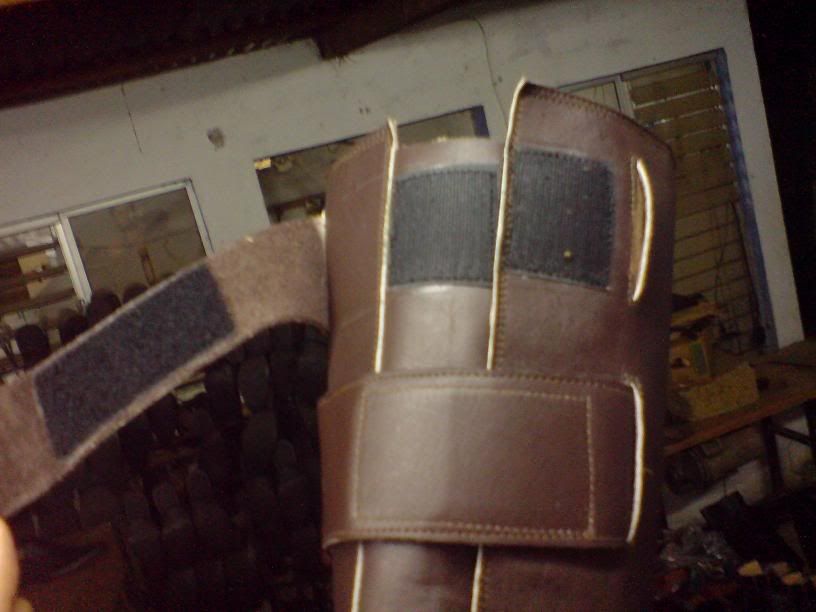 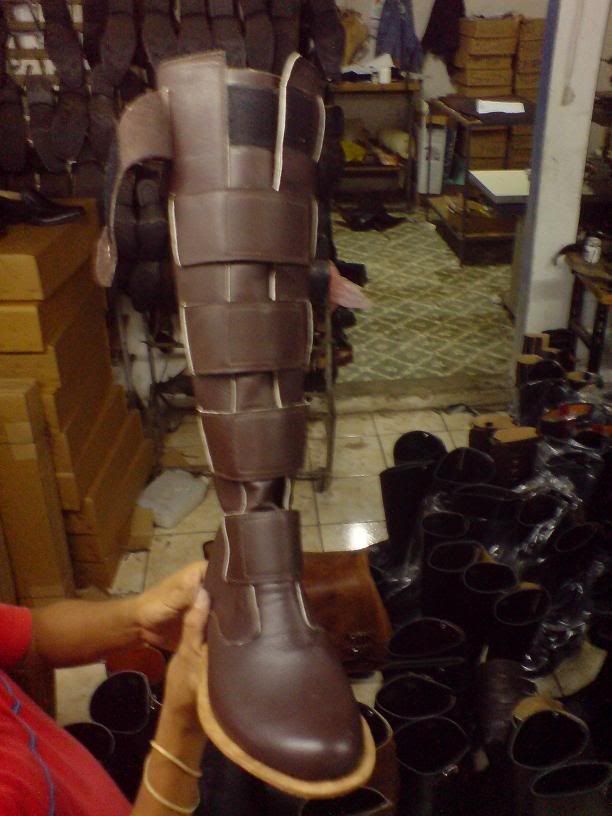 I will likely take a little 400grit and scuff them up a bit, then work some dark oxblood polish into them for a better color tone. I'll hit the cut edges with the dark brown as well. ~ Koda |
|
|
|
Post by Koda Vonnor on Apr 20, 2008 10:00:54 GMT -5
Yesterday, my sister and niece were kind enough to help me do some plastering. These photos are, among other things: - Incentive to lose that belly-roll - A revelation that my body lacks symmetry - A study in 3-Dimensional curves and intersecting planes  A "chestequin"  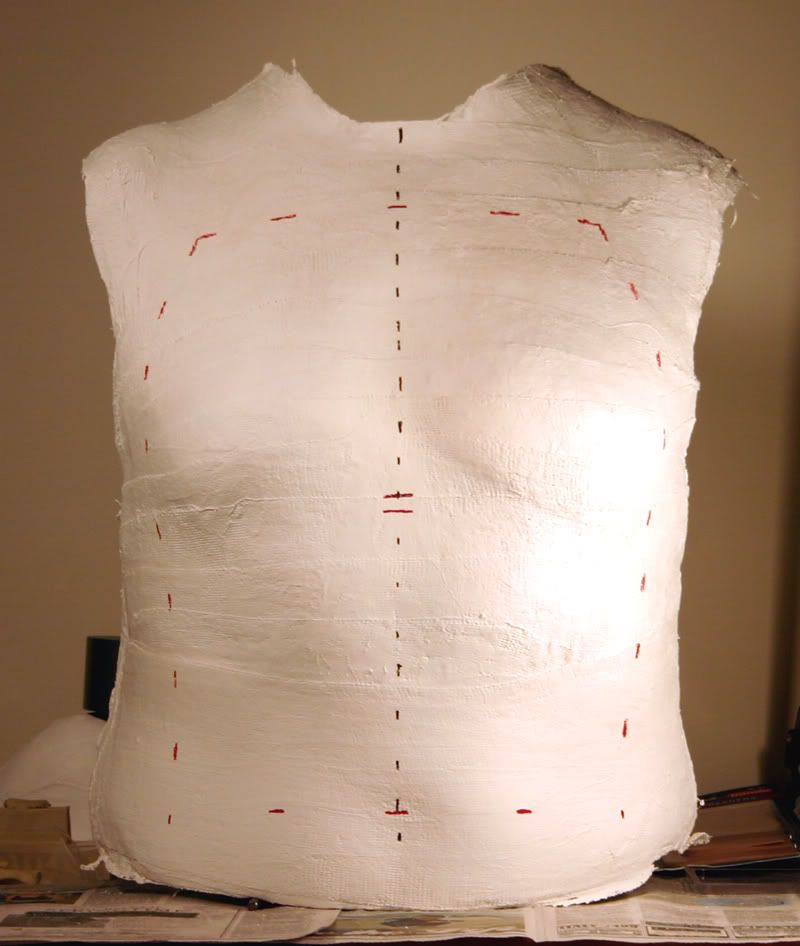 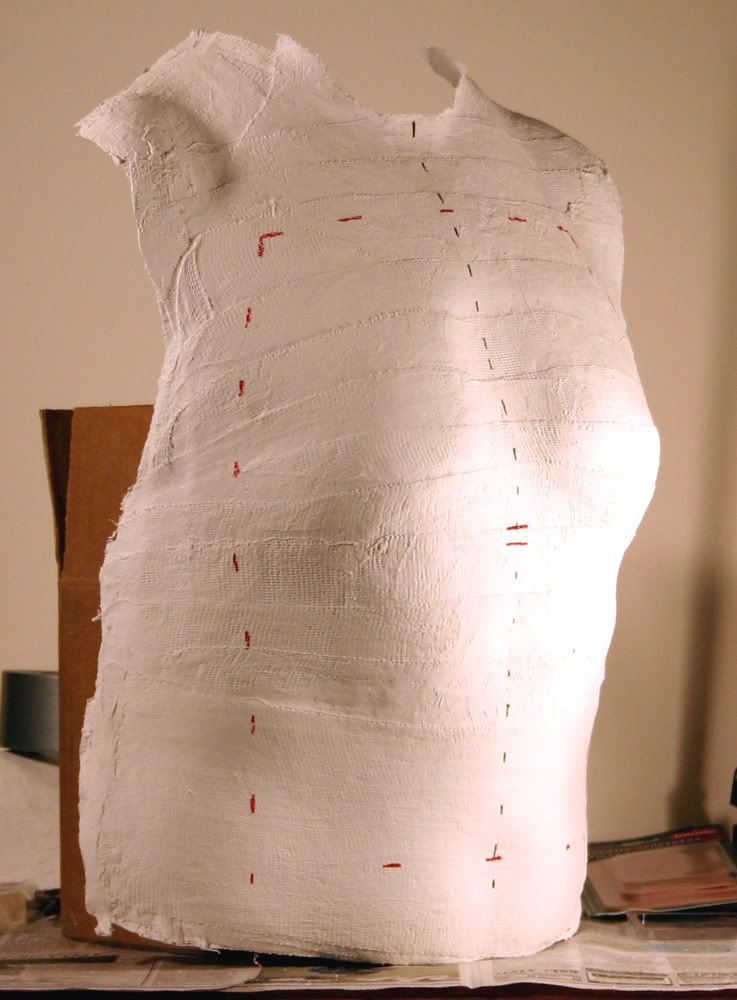 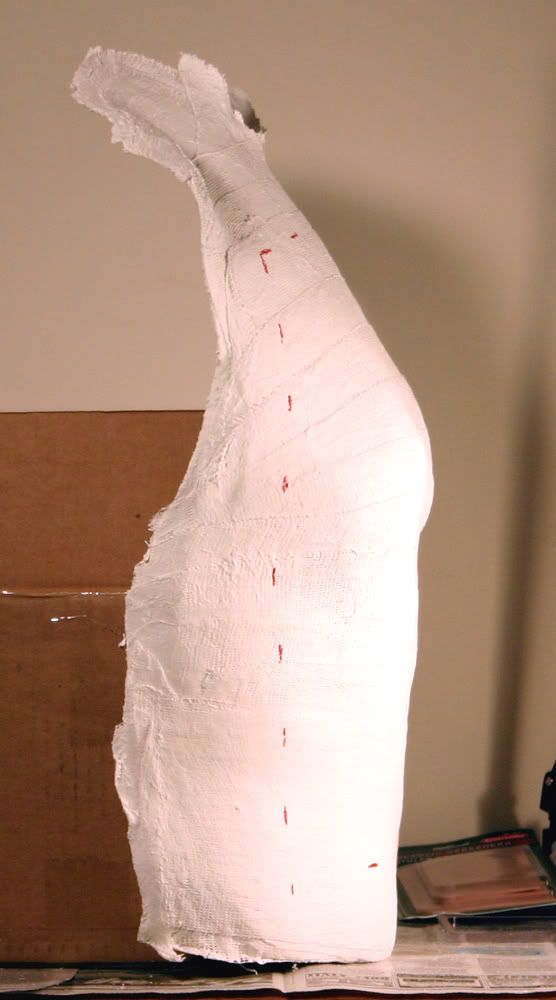 ~ Koda |
|
|
|
Post by Jedimom/Cor-Al Gelkar on Apr 20, 2008 16:49:21 GMT -5
Interesting
|
|
|
|
Post by Koda Vonnor on May 3, 2008 14:45:46 GMT -5
|
|
|
|
Post by Kryy Jacobi on May 3, 2008 21:25:36 GMT -5
Love watching the progress, and I can't wait to see the real thing at D*C! Thanks for letting us share the "journey"...  P.S. I need glasses or else I must be hungry... I was scrolling back through and saw the red Solo cup with the wood scraper things and thought... "French fries"! P.S. I need glasses or else I must be hungry... I was scrolling back through and saw the red Solo cup with the wood scraper things and thought... "French fries"! |
|
|
|
Post by Koda Vonnor on May 3, 2008 22:25:07 GMT -5
Yes, and the little yellow sponge could be a hamburger!  ... did you want sculpytools with that?... ... did you want sculpytools with that?...  ~ Koda "SubliminalFoodvertiser" Vonnor |
|
|
|
Post by Kryy Jacobi on May 5, 2008 0:09:47 GMT -5
Actually, I was thinking a Gouda cheese... but a burger would be more appropriate. ;D Hey, why be subliminal? You could add advertising to the back, like they do with youth sports league jerseys... "Eat at Dex's Diner"... umm, maybe not...  But anyway, thanks for a good laugh!  |
|
|
|
Post by Koda Vonnor on May 10, 2008 15:59:40 GMT -5
Here are some more shoulder armor progress pix: I have smoothed down the surface and added mold walls around the edges. Those will define the 1/2" thickness of the finished pieces. I still have to seal the model with clear spraypaint then put it in the fridge for a bit. Then I'll add a center ridge wall to make a two part plaster mold. I want the model cold to limit squishy distortion when I put on the center ridge. Also, I realized after looking at these photos that my outside mold walls need to taper in the opposite direction than what they are now. I've always been a little 3-dimensionally challenged.  I will cut some clay wedges and add them to those walls. 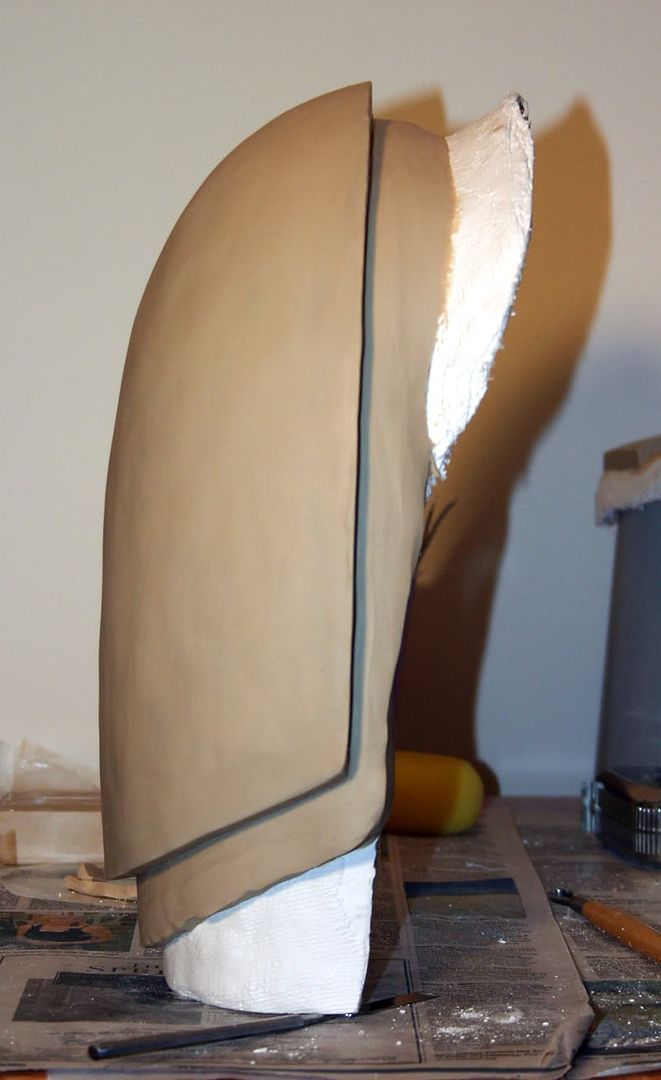 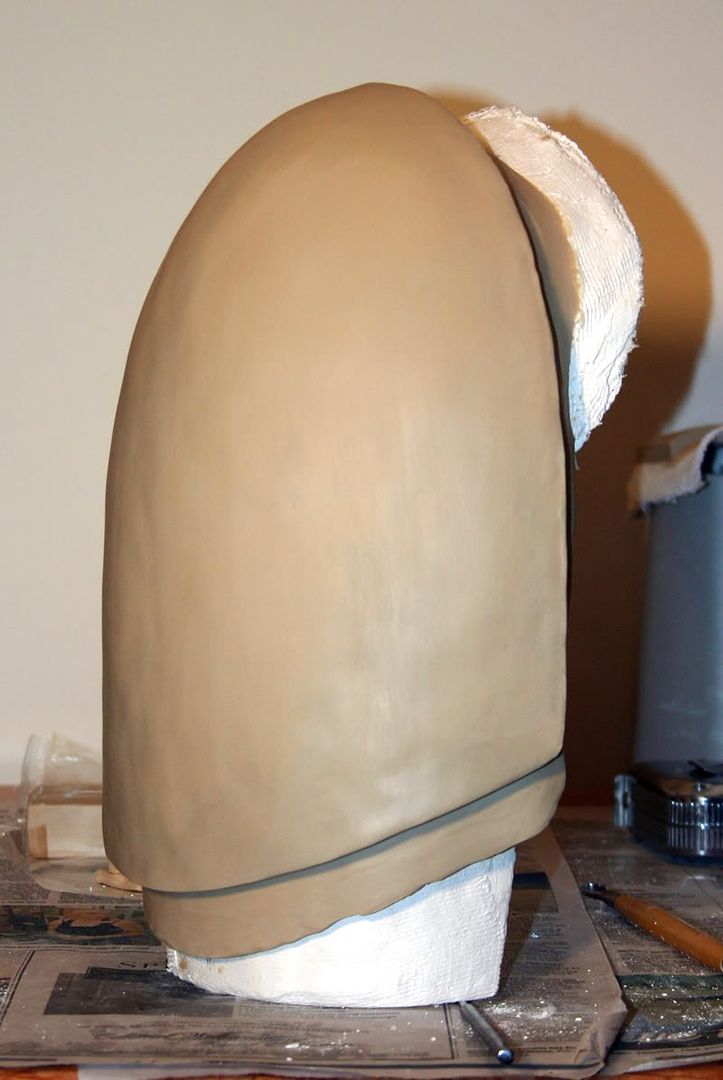 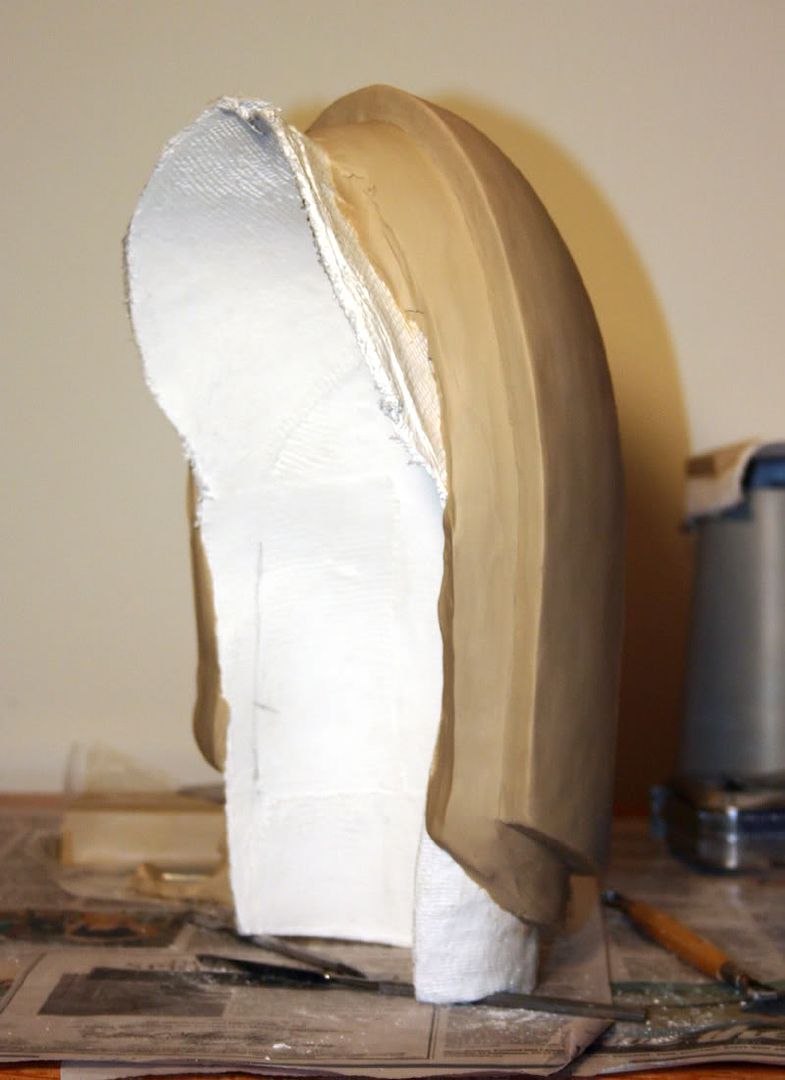 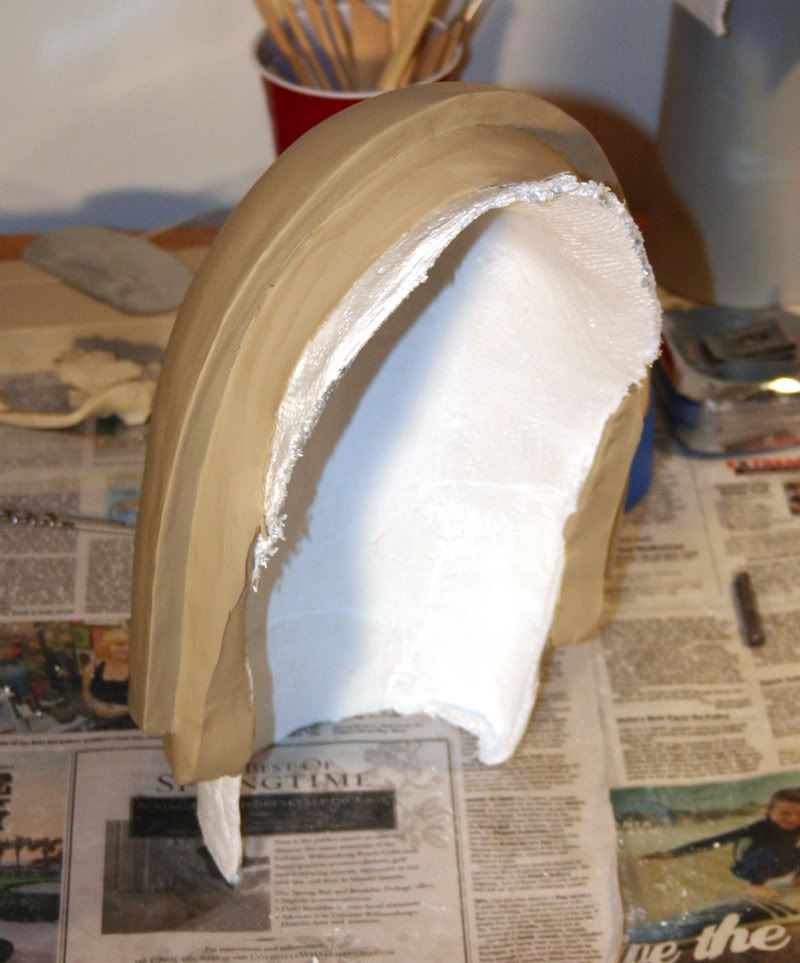 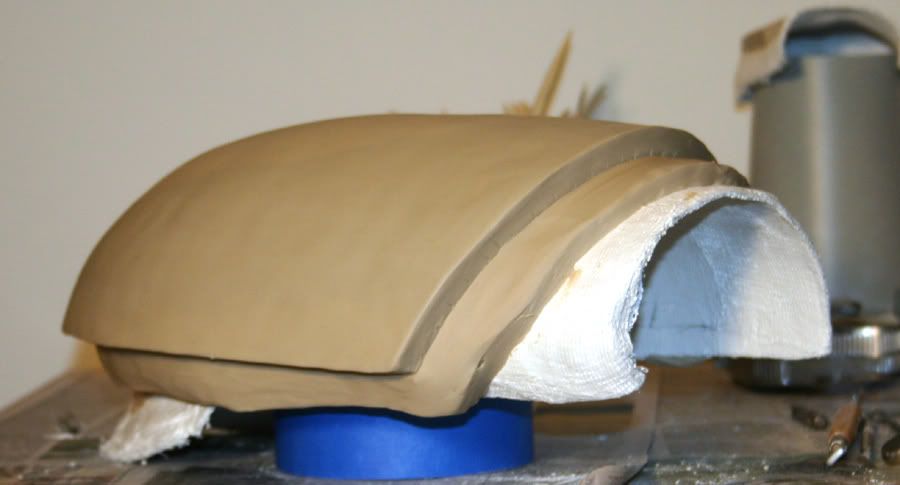 ~ Koda |
|
|
|
Post by Koda Vonnor on May 11, 2008 18:23:21 GMT -5
Today I went back to he handguards. I wanted to practice with the plaster before tackling the two-piece mold for the shoulder bell. I cut out the right side and shaped and smoothed both. Then I hot-glued cardboard walls around the clay and covered both assemblies in clear gloss spray paint. I mixed up some plaster and poured it into the little cardboard "bowls." Out came the handguard molds!  Now to just spread in some liquid plastic and fiberglass. There will be many "firsts" for me in this project, and I wanted to share lessons learned. - When mixing up the plaster, start with half the water you think you'll need (The level rises as you add plaster and I ended up having to sluice off some half way through mixing) - Add less plaster than you think you'll need. I kept adding plaster as I mixed 'cause it felt too thin to me, but when I went to pour it it stuck in the bucket like a Wendy's frosty. Luckily I was able to coax it into the mold assemblies and tamp it down (mostly) flat. - Resist the temptation to use your thumb to smooth out the hot-glue.  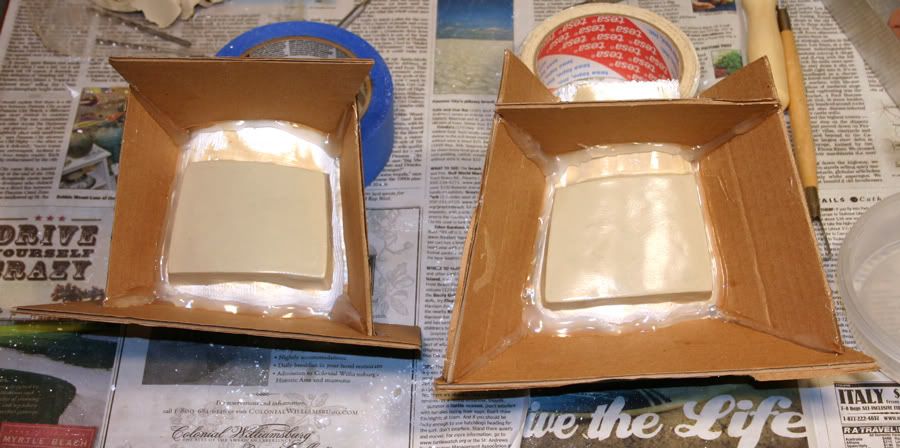 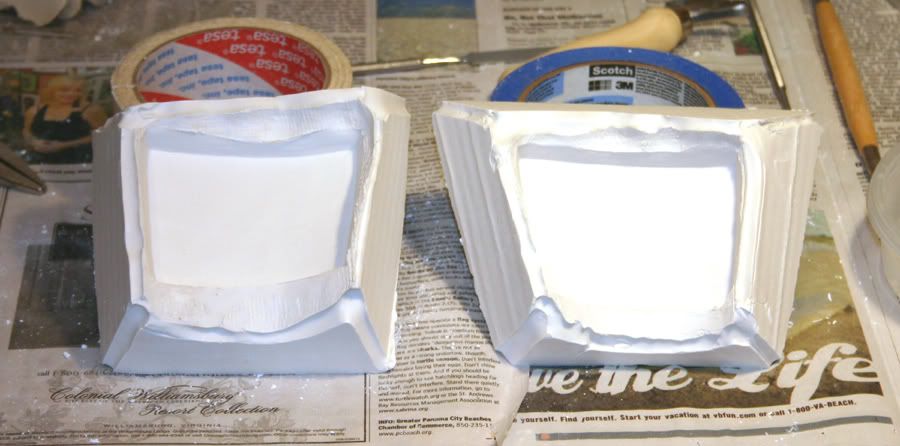 ~ Koda |
|
|
|
Post by Ky-Wan Zann on May 12, 2008 23:47:03 GMT -5
Looking great Kota. Koda eh you knwo what I mean
|
|
|
|
Post by Ani-Chay Pinn on May 17, 2008 21:46:36 GMT -5
Wow, that's looking really good. I look forward to seeing the final product after all this!
Aaaaaaah, there is nothing more revealing than seeing your body's true shape case in either plaster or duct tape. It seems that after a certain age you can only minimize that belly roll. It never seems to go away though you can minimize it so the costumes look better.
|
|
|
|
Post by Koda Vonnor on May 19, 2008 10:07:33 GMT -5
Just a small update, no pix this time.  Saturday I took a plaster mold of the shoulder plate. The armature was beginning to soften from all the humid weather we've been having here, so I wanted to get it in a plaster negative as soon as I could. It turned out pretty good, with only a few air bubbles that had to be stuffed with clay. I spray-sealed it and was going to lay in the resin/fiberglass yesterday but the weather didn't cooperate. Hopefully I can get to that next weekend. I want to allow a full day as this is all still new to me. This first cast will still be just a hard model of the shoulder, one that I can shape and fill to get it just right. Then I will make a two-piece mold of the hard model and cast it using gray gelcoat and fiberglass. Since I couldn't do the liquid plastic work yesterday, I got started on the chest plate model. I rubbed clay into the plaster-bandage armature in the pattern outline of the armor, and filled in most of the low spots. I plan on putting on just a thin layer first, to define the 3-D contours. Then just roll out 3/8" slabs to form the left and right plates. If I lay them on my thinner foundation carefully it will reduce some of the detail work in cutting the vertical center groove. ~ Koda |
|
|
|
Post by Koda Vonnor on May 25, 2008 16:55:03 GMT -5
Another weekend, another project update.  Took casts of the handguards yesterday, I mixed up gray colored gelcoat (3wht/1blk) and laid it onto the molds, then practiced layering in fiberglass. Put in 4 layers and finished them off with another layer of gelcoat. The surface got a lot of brushmarks in it. I think I used too much sealer or mold release or something. I'm sure I can sand down the brushmarks. Today I cast the hard model of the shoulder piece. I made my own gelcoat for this one (1bondo/1resin) and did not use a brush to spread it into the mold. I just poured it in the "bowl" and kept rotating it all around 'til the gel started to set up. This left only a VERY thin coating around the edge undercuts, so I mixed another batch and made it thicker (2bondo/1resin). This coat I brushed in and after it started to thicken I pushed more into the undercuts. I layered in the fiberglass (3-4 layers) and finished off the undercuts with a VERY thick paste (4bondo/1resin). I want to let it harden overnight before I crack it out of the mold. I'm going to build up the inside with clay and sand the outside smooth, then make a two-piece mold from that. I'm going to make the final shoulders out of poured feather-weight plastic. You can see the fiberglass layers in the photos. 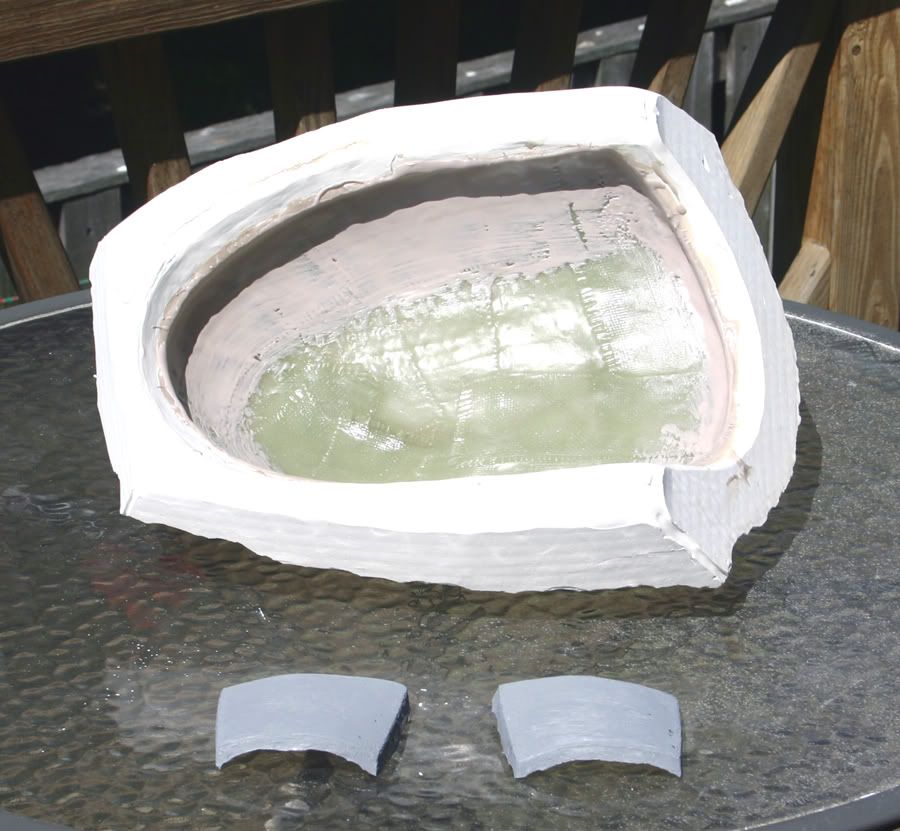 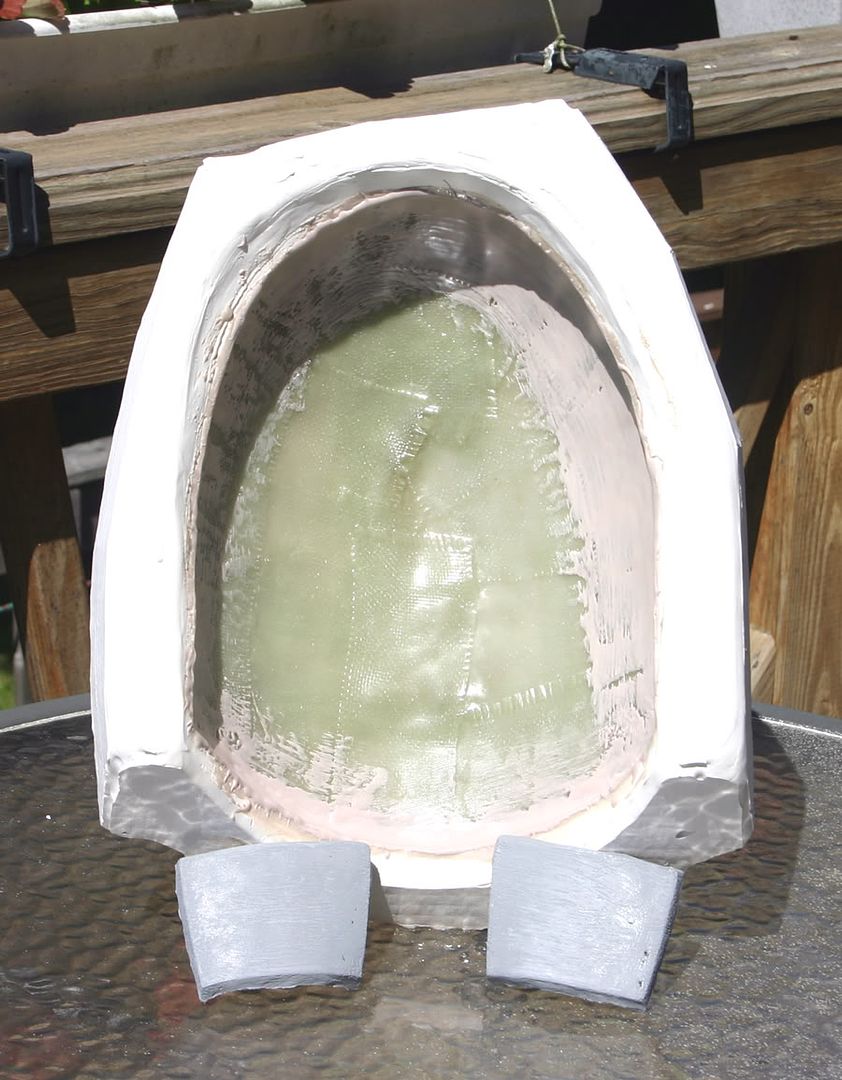 ~ Vonnor |
|