|
|
Post by Jedimom/Cor-Al Gelkar on Jun 14, 2006 12:01:27 GMT -5
I think I actually got mine off of ebay for like $5. I didn't even have to pay shipping cuase the seller was in the town right next to me -- something I have never before encoutered on ebay
|
|
|
|
Post by Naar Birala on Nov 7, 2006 12:25:46 GMT -5
|
|
|
|
Post by Terek Kelrune, the Jedi Ranger on Oct 8, 2008 22:52:11 GMT -5
|
|
JediKai
Message Board Member
TJA Savior
Posts: 5,560
|
Post by JediKai on Oct 9, 2008 0:19:54 GMT -5
Very nice. I has been a long time since someone posted.
|
|
|
|
Post by Kryy Jacobi on Oct 9, 2008 21:50:11 GMT -5
I like, I like... especially the different color scheme. And you got the paint so smooth! Mine was so splotchy, even with a primer.  Sometime I'm going to have to get mine out and work with it again. |
|
|
|
Post by KaiRhann on Jul 26, 2011 11:50:22 GMT -5
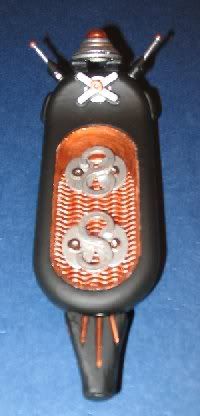
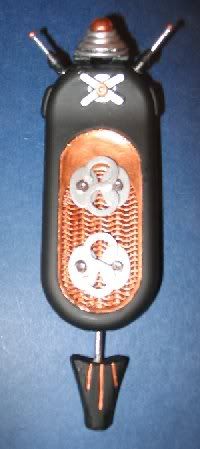
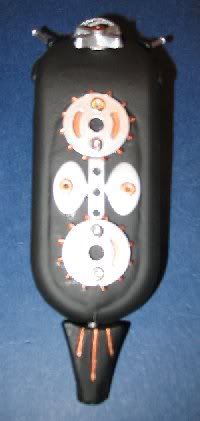
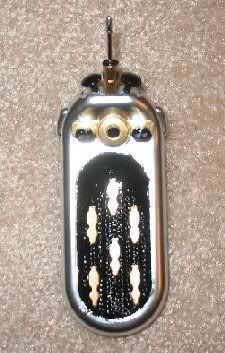
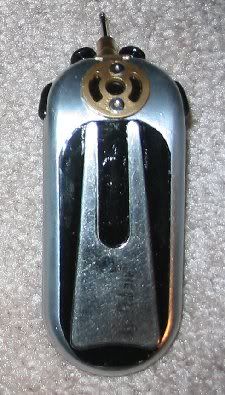
Here's mine. I made this one recently to replace one that was given to a young padawan I encountered. The base is, of course, a ladies' Gillette razor. For filling in the top after removing the "guts" of the razor, I used epoxy putty (Lowe's Plumbing Dept.) I removed the rubber "grip" on the back and filled it, then cut a plate of sheet aluminum to cover it, and give a raised panel. The circular piece on the back is a knock-out from an electrical box. Other bits, such as the brass "antennae" are various found pieces from work (I work for a company that manufactures electronics). The "buttons" are custom, as is the "voice pick-up" and flange that the "vpu" fits into. Finally, mounted on the front, atop the rubberized grip of the razor is a stripped down speaker from a bank intercom.   ~Kai-Rhann |
|
|
|
Post by KaiRhann on Jul 26, 2011 14:48:52 GMT -5
I assembled this comlink on a whim. My wife had asked about a "different" comlink in a recent Star Wars RPG session...and the only sample I had was a "Jedi Comlink" (Sorosuub Hush 98). I put this one together thinking "basic comlink". It is made of various parts, including a microphone, a small length of steel tubing, a plastic knob, and two small screw/knobs. Sorry for the low-quality image (taken with cell-phone...ironic)  ~Kai-Rhann |
|
|
|
Post by KaiRhann on Jul 27, 2011 19:03:39 GMT -5
I had a "scrap" rubber grip from one of the Gillette razors, and decided to make an odd comlink. I figure this might be an earlier model of the Sorosuub Hush-98...  ~Kai-Rhann |
|
|
|
Post by Ky-Wan Zann on Jul 28, 2011 0:44:50 GMT -5
Nice stuff
|
|
|
|
Post by Starkindler (The Naked Jedi) on Jul 28, 2011 16:47:16 GMT -5
I need to get back to this project.
I assembled the needed pieces but got intimidated by the fact that all I could get was the Gillette razor with rubber grips....hard to paint....and it's green.
|
|
|
|
Post by KaiRhann on Jul 28, 2011 20:55:54 GMT -5
Don't let the materials intimidate you. Actually, I've had good experience with Krylon paints (spray). The Krylon Fusion paints for plastics might work better than others, but I've just used the standard types.
One tip that might help, since I paint a lot of miniatures (for RPG's) I've picked up a few tricks...particularly using washes or "inks". "Inks" are simply watered down paint in this sense of the term. Thinner paints flow into all the nooks and crannies of miniature, so it's a way to add depth to a painted figure (the darker "ink" wash doesn't do much to the painted higher surfaces of a miniature, but collect in all the little depths of the carvings. Thus, when the ink dries (takes a little time) you have great detail.
For my Hush-98 Comlink, that's the same technique I used to get all the grooves of the rubber grip black. Seems that if you lay on the spray paint heavy enought to get all the grooves, you've used too much paint, and it seems to remain "sticky".
For the ink wash, I used Acrylic paint for ceramics (Ceramicoat, Apple Barn, any brand like you would find at Wal-Mart, Michaels, or Hobby Lobby). Thin to "taste" (usually about like india ink) and apply heavily enough to flow into and cover all the grooves. You can "mop up" any extra with a paper towel, tissue, nearby pet, or other handy absorbant item.
I sometimes use a "dry brushing" technique (where one paints with very little paint on the brush...lightly brushing over the item so that only the highlights are accented by paint) to give a worn or aged appearance.
Hopefully, that helps some...or at least takes up space on the boards...
~Kai-Rhann
|
|
|
|
Post by Starkindler (The Naked Jedi) on Jul 29, 2011 19:39:30 GMT -5
Thanks for the tips Kai-Rhan...
I used to paint lead miniatures back in my D&D days....still have a DragonChess set I built that needs the figures painted....too many to detail so I plan to go with Gold and Ruby for the two sides.
I shall look into the wash idea for the crannies of the grip....and the Krylon Fusion paints for plastics may be what I need.
|
|